To my readers......

SITE UPDATE NOTICE

Thanks for visiting mitchmen, home of Mitchell's Gay Art

The Caps and Collars/ Flat Cap Gang story at Google Groups is on a summer break until July. (see Group News for link)

Message updated 25th June 2023

Sunday 31 October 2021

The Art of Roa 5 - Jamie & Kayle

Roa - Jamie Undergoing Testing

Roa's 'Jamie' is a superhero who gets himself captured by villains and naturally they want to find out what makes him tick. This leads to a series of 'Lab Rat' medical images of which this is the best. It's a highly erotic image that must rank amongst the best of this genre with the understated anal plug seemingly controlling the helplessly spread-eagled Jamie. The uniformed character conducting the physicals is a little odd but the rest of the lab crew have a marvellous authenticity.

Jamie is another tricky character for me with age and gender ambiguities that I don't want to feature at mitchmen. This rules out a number of pictures in which Jamie is captured and subjected to imaginative torments but luckily there are other excellent images that don't have this problem.


Roa - Jamie Spread-eagled and probed

The investigation of Jamie's superhero orifices continues with him tightly strapped down on an X-cross platform while his testicles are tantalised by electro impulses. The technicians have splendid air of professional detachment, the nearer assistant even appears to be doodling on his instructions. We can only assume that they have somehow nullified Jamie's super-powers.

I love the use of yellow for the equipment in these scenes, it's a colour associated with construction activity rather than medical facilities or labs which we expect to be white or silver. It seems to give the proceedings a touch of mechanical crudeness.


Roa - Kayle To The Rescue

Help is at hand for the beleaguered Jamie in the shape of his friend Kayle (no relation to the Greens). This nicely atmospheric scene shows him having infiltrated the heavily-patrolled premises in his Special Forces style of combat suit. It adds impressive bulk to his physique and the heavy texturing is erotic for latex specialists. It probably incorporates lots of technological features of value for secret missions, but I'm not sure what his vision aid does! 
 
The conventional military attire of the guards is suitably flattering to them. It suggests this place has government sponsorship rather than being simple the work of well-organised criminals, which earlier images in the series imply.
 
The cropping of this picture tells me that Roa is not a bottom fancier!


Roa - Kayle Captured
 

Kayle succeeds in finding Jamie but before he can free him he is surprised and captured himself by the patrolling soldiers. Here Kayle kneels submissively and his facial expression captures that sense of being annoyed with himself for making the mistake. This scene is nicely constructed with the reinforcements seen hurrying in at the back adding a sense of deepening crisis for him. It gives his situation a mild erotic edge, but his black kit gives nothing away in that department.


Roa - Kayle In Captivity

That doesn't matter too much because Kayle is soon stripped and his combat suit taken away for examination. He is revealed to be wearing some fairly average underwear (all good for a wholesome manly image) and displays a good physique with bigger than average nipples. The restraints he's been clapped in force him to kneel and the room with it's tiled floor looks suspiciously like a toilet. That sparks imaginings of dirty deeds by the soldiers passing through (so to speak). He looks as if he might already have thought of that himself.


Roa - Kayle Under Examination

 Soon enough Kayle is transferred to a lab (sound-proofed, note) where he is secured in the embrace of a robotic device with the capability to position him in any pose his captors might desire, or it may be that extreme manipulation of his limbs is it's very purpose. The collar which half encircles his neck seems poised to deliver further unpleasantness. There's some heavy duty equipment in the background which bodes ill for Kayle, the 'JCB yellow' sparking fearful possibilities of rough treatment. Next to this weighty mechanical threat, the tether of rope seems highly incongruous but I suppose something had to be done with that erection! This looks like a detail of a larger image which might supply the answer to that puzzle.
 ~
 Read this series from Part 1
~
Roa seemed to just vanish a few years back, I can't find him anywhere on the net including pixiv and Patreon. Roanovel on Deviant Art is still there but empty apart from some interesting pieces by other artists, his Tumblr site referenced on the pictures is gone. 
 
There's a small gallery at Daddyshere which has a few images not included in these mitchmen posts
 
If you know more about Roa's whereabouts please leave a comment.

Saturday 30 October 2021

News: Teddy of Paris

Teddy of Paris - Passion du Fruit


 Teddy has been in touch to say he's planning to launch a Patreon page. It's good to see him returning to the scene. I will update at mitchmen when I know more. You can read his correspondence attached to the 2014 mitchmen review of Teddy's work.

Thursday 28 October 2021

The Art of Roa 4 Jim & Leon

Roa - Jim & Leon - Image 28a

The opening of Roa's story of woodcutter Jim shows him remonstrating with his brother Leon, who is a soldier. It seems to be a classic theme of the peace-lover vs the action man approach to life. These roles contrast with the visual characterisations, however, Jim is big and strong (and rather sexy in his tights), Leon is distinctly boyish, an improbable fighter. Roa seems to be exaggerating his youthfulness here to show how dominated he feels by his older brother, because he matures dramatically in the next image where their rivalries and disagreements suddenly become unimportant.


Roa - Jim & Leon - Image 28b Brothers For Sale

Both brothers are taken as war booty and sold into slavery (as a pair). Manacled and naked on the auction rostrum, their anger and confusion at this turn of events is well captured by Roa. I also like the figure of the Roman-esque auctioneer in this image. With his suave, salesman's looks and smooth manner it's not that hard to imagine him selling his own mother.


Roa - Jim & Leon - Image 30 Two New Slaves

Jim and Leon, still totally naked and manacled meet their new, noble master. Their longish hair is an indicator of their rustic background, suggestive of rough manners and toughness, that contrasts with the refinement of the nobleman.

Making inferiors stand while you sit is a basic control device. The two young men tower over him and that effect is increased by a slight distortion of size and perspective, but they both seem to look younger than ever which serves to emphasise just how much they are intimidated by his status and unseen power, deferring to him even though he is unarmed and puny in comparison to their physiques. Astonishingly Roa even contrives to make their posture seem to somehow convey their confusion and fear. The nobleman revels in his power over these two fine specimens. He lounges back, legs spread provocatively with a hand hovering over his crotch, hinting at a simmering sexual interest.

The room is an interesting combination of refined elegance and crudeness, with fine furniture, artworks and carpets to one side but transitioning to bare boards and exposed brickwork in the area where the brothers are standing. It seems to underline the chasm between their previous positions in life but it also hints that the room has a dual purpose. As though confirming this, in the background we glimpse a table surmounted by a curious key-hole like device suggestive of sophisticated, perverted pleasures.


Roa - Jim & Leon - Image 37 Leon Groped
 

Leon has now been given a haircut to suit his new master's taste and (no doubt) to 'civilise' him. It's a rather nice demonstration of the absolute power that the nobleman has over him. Less subtle is the collar and dangling chain, a badge of his subservience which is so complete that he doesn't need to actually be restrained.

He is forced to kneel on a table while the nobleman and his cronies savour his beautiful flesh, touching and groping him and thrilled no doubt by his involuntary, virile response to this humiliation. Roa doesn't characterise them as evil, old lechers but as rich, desirable men in their own right (on the face of it). Leon grits his teeth but there's a resigned sadness alongside his anger. That only serves to add to the pleasure of his cruel master of course.


Roa - Jim & Leon - Image 40 Jim's Pony Duty
 

Jim's fate seems to be that of a more traditional slave, fulfilling his master's pleasure in a more physical but equally humiliating way. I'm glad that Roa allows him to 'pony' like the natural beast he is, without the usual horsey trappings which often tend to feminise (as in Leo's story, 'The Estate', but see also MCarcel's pony interpretation). Jim's heavy collar and chain serves as a makeshift rein, which is only needed to command his obedience since he can understand spoken directions perfectly well (in mitchmen-speak, this is known as keeping him in his place). The weight attached to his balls indicates there's also an element of punishment in this particular chore, it's because Jim has shown he is a rebellious character, resisting attempts to 'breed' him.

Can you spot the mistake in this image?


Roa - Jim & Leon - Image 44 Leon Suspended
 

 Leon meanwhile suffers the same suspension torture as Eric in Part 3. My own name for it is the Backwards Crab. Whether this is a gratuitous example of the nobleman's sadism or if it's a punishment for non-cooperation I do not know. Either way, his lordship takes advantage of another opportunity to enjoy Leon's body, this time licking his nipple and grasping his cock as he writhes in the agony of the chains.

Roa gives us another splendid torso here with notably well-developed thighs, posed in a sexy backwards arch. Leon's masculinity bursts out of this picture. It's an ambitious, 3-dimensional pose but one that is a difficult image to integrate realistically into a complex composition. The out-flung arms and the slight angling of the body towards us are highly suggestive of movement, say of falling or a struggle, but the vertical chains imply he is simply hanging.

Compare with Eric, getting the same treatment in Part 3, this is a safer sideways-on view and his body is more relaxed, but his chains are angled towards a central suspension point, a more believable arrangement that also brings out the stressing of his back and makes clear the difficulty of movement.

In his image Leon dwarfs his admirer both in size and more subtly in sheer presence. The depiction of the nobleman seems flat compared with Leon's 3D trajectory creating the effect that he's pushed aside and diminished, grabbing at morsels rather than directly involved in Leon's psychodrama. By contrast Eric and his tormentor are fully aligned with each other, which creates a strong sense of direct interaction between them.


Roa - Jim & Leon - Image 48 Jim Rebels

 Having been consigned to work in a quarry, Jim shows his virtuous nature and his rebellious spirit when he protects a boy captive from the cruel overseer's whip. It's a relatively unpolished picture but Roa's knack for expressive imagery makes up for that, bringing out Jim's protective strength in a most impressive, almost biblical way.


Roa - Jim & Leon - Image 53 Jim's Punishment

Needless to say, Jim's intervention does not go unpunished, the ball weight returns and he's given all the biggest blocks to carry (there's obviously a big building project in hand). The angry overseer pays close attention to him, to the relief of the other slaves. The fantasy of enslavement where abducted men are forced to do physical work has the virtue that it showcases their physiques and manly characteristics and that has a special resonance for me.


Roa - Jim & Leon - Image

 There's a satisfying symmetry in the fates of these two brothers. Whilst Jim's occupation as a woodcutter leads him into a role of physical labour, Leon the former soldier is forced to train as a gladiator. He shows the same rebellious spirit as his brother and suffers the same uncompromising punishments. One senses that their paths may ultimately be destined to converge in the arena, when their rivalry and different attitudes towards fighting (implied in the opening scene) will factor in the ultimate test of brotherly love. As with other Roa stories, however, I have no information on how it all ends, except that there is an Image 58 which shows Jim back at his woodcutting. 

This mitchmen series on the Art of Roa concludes in Part 5  

Read this series from Part 1

Saturday 23 October 2021

The Art of Roa 3 - Eric

I've updated this article with the correct storyline and an extra picture plus links


Roa - Eric 15 (Eric Captured)

Defeated in battle, Eric is bought into camp at the head of the band of captive warriors. He is renowned as the best fighter in his tribe and Roa gives him another special, restraint arrangement that reflects his prized status - a sort of wooden yoke in the style of a medieval pillory. He is also forced to go naked in front of his men, whereas they seem to be wearing crude loin cloths*.

It occurs to me that the scene in which these defeated men were forced to strip out of their armour and uniforms, perhaps on the field of battle would be full of rich erotic possibilities but as far as I know Roa did not explore them. Who supplied the loin cloths, I wonder? Maybe the impoverished locals 'looted' the POW's as they were being marched by, forcing them to swap clothes, who knows?

Roa depicts Eric as a darkly, handsome man with a muscular body (of course). His is a similar story to Graham's (shown in Part 1 of this mitchmen series on Roa's art). But whilst Graham's arrival as a captive  had a certain ironic glory, Eric's is more down-beat, almost as though he were despised by his captors. This is reflected in a changed viewpoint, we seem to be looking down from an elevated vantage point, secretly watching his private humiliation.

The escort (dressed in rather stylish, black outfits) drive their captives along using coercion, pushing them and pulling their hair. Eric himself has a guard's foot planted on his backside, propelling him forward. Beyond the main group there's a pair of dejected men being dragged along inside a mobile, timber cage. Their segregation from the main body of men and privileged use of transport suggests that an extra special fate awaits them.

Roa uses the aerial viewpoint to good technical effect here enabling us to see these separate elements of a crowded scene. He's placed the figures so that the composition remains compact and coherent in this view (whereas some renderers maroon their figures in vast empty spaces when they switch to the elevated viewpoint).

Roa - Eric 14 (part of) Eric Defeated

This image supplied as an introduction by Roa explains (in slightly disjointed fashion) the background to Eric's capture, you will see that it features Graham with his distinctive ginger hair, in fact the stories of these two characters are interwoven with each other


Roa - Ready For Torture

Spread-eagled in an Amalaric-style, X-frame this naked captive* awaits the pleasure of his captor who appears to be a man of some significance, well dressed and with stately bearing. A minion (presumably the regular torturer) kneels obsequiously before him, offering up his whip, which is accepted with manic glee. It suggests he has a personal animosity or grudge towards the captive. Perhaps the captive is (or rather has been) the proverbial 'thorn in his side', typically in these tales he's the rightful heir who has been usurped, but I cannot illuminate further (** see footnote).

His lordship spurns the array of crude devices spread on the torturer's table behind him in favour of the classic whip. He does not deign to bare his torso as common torturers do. Presumably he's indifferent to the risk of soiling his expensive clothes with flying body fluids and not intending to labour long enough over this man to work up a sweat, instead relying on his expertise with the weapon to make his symbolic contribution short, but stingingly sweet.

Interestingly, the captive is hugely aroused by their confrontation (or what goes with it). He is a marvellous specimen of manhood and gives us another example of Roa's splendid muscular backs with cute little buns as an unexpected bonus. Who would want to sully such a man? (Don't all shout at once!)

**This picture comes from a group labelled 'Savage Warrior'. The dark hair of the captive and the black clothing of his captors seem like a precursor to the Eric series. There is an 'Eric' equivalent of this scene but it features the near-juvenile Alphons as his tormentor so I'm not willing to include it here.  This alternative fits in well and it's a great, nicely detailed picture with more clever use of the aerial viewpoint.


Roa - Eric-29 (Abused)

The scarcity of tell-tale wounds on Eric's body in this image seems to confirm that he has suffered an economic punishment from the whip (but not necessarily a mild one). These moderate signs of physical damage show a degree of restraint on Roa's part as well as Eric's captors, which I for one appreciate. After all, why mutilate such an object of beauty and desire?

As you see, however, Eric isn't about to be spared from further degradations and this time it's crude sexual abuse at the hands of a different man. His tormentor this time is Graham (from Part 1). His character in this sequence seems very different to the romantic, ill-fated lover of Alphons. He's shown here wearing chain-mail tights, which I suspect are probably sexier for the viewers to look at than for him to wear - and even more uncomfortable when they're rolled up to waist high!


Roa - Eric-32 (Suspended)

Eric is suspended in a painful back-breaking position and forced to service his captor. Tormented by his own weight, which also prevents him from freeing himself, this extreme technique impresses on the victim just how helpless and hopeless his predicament is.

This restraint position in full suspension is spectacular but more dangerous than most, particularly if prolonged, so please don't try it at home!

For on-lookers this stressed position produces some beautiful body shaping, notably of the buttocks, but also the back and shoulders. Both of these features are accented in Roa's image by beautiful, grainy highlights, suggestive of body hair and sweat. 

Simultaneously the downward bowing of the torso lays open the victim's frontal vulnerabilities, especially if he is nude and free to dangle. Roa rather cruelly draws attention to such danger by showing Eric's tackle balanced on the blade of Graham's sword (a rare and considerable feat for the swordsman, considering the area is out of his sight and his full attention is otherwise engaged). Hopefully he's only considering using the flat of the blade to tap or whack, leaving the threat of the cutting edge as just that, an intimidating threat. It's a particularly potent one I suppose if you are a 'rightful heir' and expecting to father the next in line.

Given the inherent dangers of this pose in real life rather than fantasy, it is fortunate for us that nearly all the erotic interest can be reproduced without lifting the subject off the ground. The earliest photo example I can think of is the classic bondage image produced by Bound and Gagged back in the 90's. Another mitchmen article on 'Rhino' posing at Extreme Boyz also explored the potential of this restraint, showing the suppleness demanded of anyone who tries it. More recently it's been used regularly on subjects at Russian Captured Boys and there's a memorable Ulf image using a hammock-like arrangement which in turn is based on a photograph which I'm sure I've got somewhere but can never find!


Roa - Eric-39 (Enslaved)

After further varied tortures, it turns out that Eric is not facing immediate death, nor mutilation but only enslavement (only!). This image shows him wearing a giant, metal collar with matching manacles, which are the stereotypical symbols of this terrible fate. The collar is obviously very heavy and extremely tight too, judging by the stress/stretch lines in his neck. It's a reminder that his  life is still very much in the hands of others.

Eric's sufferings do not seemed to have harmed his voluptuous physique, it's mature development belies his boyish face, but he bears those weighty nipple rings as though born to it. They are complemented by an ugly, skewer-like dick-plug suggesting that even if his tackle has been reprieved for now, he's not going to be allowed to use it to sire a new pretender to the throne or for anything else, except by arrangement. His virile response to the insertion must infuriate his tormentors!

All in all, however, these encumbrances hardly seem conducive to a good day's work in the fields. Perhaps the real, sadistic intention is to ensure his punishment continues as he works or even to bring about a slow, lingering but vaguely legal demise by working him to death.

~

More slavery in Roa – Part 4 at mitchmen (link pending

Read this series from Part 1


Thursday 21 October 2021

The Art of Roa - 2. The Captured Commando

Roa - Robert The Commando
 
Robert, the hero of Captured Commando is another idealised warrior, but of the modern era. There's a doll-like, Action Man/GI Joe element to this realisation of him but the crotch detailing suggests a more adult viewpoint. Robert might be a model, physically perfect soldier, but that will avail him of nought when he falls into the hands of the enemy.  

Roa - Run Faster Robert
 
Like Graham, the story of Robert, the captured commando opens with him being paraded naked through his captor's camp but it's very different show to Graham's glorious arrival. These soldiers drag him by his balls behind a speeding jeep. There's no crowd to watch, a row of washing hung out on a line shows camp life proceeding, unmindful and indifferent to his misfortune. 
 
The punishment, like Graham's is designed to humiliate him and demonstrate his captor's power over him, but unlike Graham's 'captured hero' treatment, Robert is deprived of his dignity and his very manhood is mocked in a degrading manner. He's exposed to serious injury if he fails to keep up and stay on his feet and the way his captors toy with him has an element of insanity about it which is more frightening to the victim than simple violence.

Roa - Robert is Groped
 
Robert's interrogation shows similar disturbing tendencies in his captors. Stripped to his camoflage underwear his cheery interrogator gropes inside, playing with the inflamed organ and implying the threat of sexual violence if Robert doesn't talk. The soldier's superior watches with interest, casually lounging in his chair with pistol raised threateningly. It's a chunky-looking weapon that reinforces the sexual ambiguities in the scene.
 
Roa's characters in this story present no age difficulties, they look exactly the age of real life soldiers, early adulthood, an age that adds believability to their unconventional treatment of him.


Roa - Robert Threatened With The Whip
 
As the interrogation proceeds, the exasperated young questioner turns to cruder methods of persuasion, but his cheery smile suggests he was hoping for just this opportunity to engage with his captive. He looks fit and strong with the physique and unpredictable emotions of a young jock. Helplessly spread and threatened from behind Robert can't believe the horror of what is happening, but his still-bulging pants suggest emotions fermenting which are more complex than simple fear.
 
Roa creates a distinct sense of  cultural difference between these antagonists that contributes to the sense of uncertainty, but it's racially neutral, both men having a mix of oriental and anglo-saxon characteristics.
Roa - Robert is Whipped
 
Robert howls in agony as the whip is applied to his back with gusto and a peverse pleasure is evident in his cruel captors. There's evidence of other punishments on Robert's body here too. At this point you suspect it doesn't matter if he talks or not. He's the pawn in a sadistic game.


There are strong similarities between this story and BrosFate's 'Captured Soldier' which was featured at mitchmen blog last year. That's true of the plot, the compositions and imagery and the technical style too, thanks to the use of the same rendering software which is evident in the distinctive, agonised face of the captive here which is also seen in BrosFate's work and is something of a rendering cliche. That is not to detract from either artist's work, they each bring something different to their interpretations of the storyline. Robert here is physically a very different man to Frank, who is Brosfate's soldier and that is enough to make a difference. The popularity of repetetively-themed erotica like Dreamboy Bondage illlustrates that putting different men through the same familiar scenarios has no shortage of interest for fetish fans. As comedians sometimes observe, knowing the punch-line of a joke can make it funnier. It's the way you tell 'em!
 
More Roa in Part 3 next time at mitchmen
 
Read this series from Part 1

Sunday 17 October 2021

Art of Roa - 1. The Conquered Hero


Roa - Graham (Conquered Hero)

At first sight this marvellous image might easily be mistaken for the work of Homoeros, a noted creator of crucufixion imagery whose work often features outside settings like this bathed in bright, Mediterranean light. But Roa spares this defeated warrior from agonising death on the cross, instead using the construct to parade him in their victory march. The prolonged suspension is painful and the forced nudity humbles him, but this spectacular exhibition they have arranged for him also pays tribute to his heroic qualities which have made him highly-prized as a captive.  


Roa - Graham (In captivity)

Soon enough though the lauded hero is despatched to a dank dungeon to await a grisly fate. His modesty has been temporarily restored with a flimsy loin cloth but the widely spaced restraints continue to draw attention to his muscular physique. They suppress his physical strength and place unnatural stresses on his body. He can be in little doubt that his captors are preparing him for further suffering.

Roa portrays 'Graham' as a well-developed adult with a ginger, buzz haircut which serves as a tribal badge in historical fantasy but also seems to convey a man with lingering youthfulness and a rebellious, unconventional character. 

The suggestively dangling loin cloth suggests there might be a nude version of this image and his wistful contemplation of that area may reflect a resignation to that area being a focus of his captor's attention. 


Roa - Graham (Nipple Torture)

So it proves. Once his real ordeal begins the modesty afforded by the loin cloth is soon forfeit and his limbs are subjected to even more severe restraint. It starts with mild but invasive manipulations that impress upon him how vulnerable his body now is to painful assault. However the heavy chains that hold him and the torturer's formal hood indicate that far worse is to come. 

Graham's slightly chubby face, stubble and body hair are representative of a particular form of rather earthy, natural manhood that you might associate with big rugby players and construction workers.


Roa - Graham (facing hot irons)

Graham's manly qualities are severely tested in a series of trials including being chained to a stone block and tortured with hot irons, one of the most extreme torments imaginable. His face in this image is a great study in mature masculinity and stoic endurance. Roa bestows on him a muscular back, which are one of the glories of his work but an inviting target for his subject's captors. 

Graham's pain in this predicament is not merely physical, he is forced to endure it in front of his lover, Alphons, who happens to be the Prince of his realm. Graham's unconventional (not to say tricky) relationship with Alphons forms the backbone of this story. Roa depicts with great sensitivity how the young Prince falls in love with his finest warrior, a man who is old enough to be his father. It's a classic realisation of adolescent hero worship and lust fantasy.

He goes on to seduce Graham him in some beautifully romantic scenes. Later, the two men are seen fighting alongside each other in battle, implying he is of an age, but unfortunately, for me, he just looks too young and the renders of him (and other characters seen in this example) don't achieve the same maleness and individuality of Graham and his tormentors.

More Roa Art in Part 2 next time at mitchmen

Roa seemed to vanish a few years back, I can't find him anywhere on the net including pixiv and Patreon. Roanovel on Deviant Art is still there but empty apart from some interesting pieces by other artists, his Tumbr site is gone. If you know more please leave a comment.

Thursday 14 October 2021

Naked Judgement by David Hueso

David Hueso - Ventrue

A naked, tightly-bound captive kneels before the desk of a seedy-looking executive who stares out of his window pondering his decision in the lights of the night time city. The brightly-lit buildings suggest the Financial World at it's ceaseless machinations, but this scene reeks of high-powered, brutal gangsterism (in the sinister Asian style, judging by the guard's elaborate sword). Not a conventional, employee, disciplinary hearing it would seem. Unless this is an elaborate interrogation technique one senses there can only be one, very unpleasant outcome.

~

 David Hueso is a Spanish artist who often produces Fantasy Historical Comic Book imagery and the word Ventrue refers to a Vampire clan, neither of which fit into the 'mitchmen' topic list, but this particular illustration, infused with deadly menace, certainly does. 

See more David Hueso at ArtStation

Monday 11 October 2021

Royale Studio 2c, Navy Romeo, The Cast

 One of the puzzles of the Royale, Navy Romeo series is the bewildering changes in the appearance and build of the actors from one scene to another. For example, is the handsome Ted (far right in picture 14 of Part 1) the same person as we see emerging from the car in picture 16 (Part 2)? Is Spike, seen also in picture 14 (centre) the same Spike we see taunting Ted in picture 28 and later departing the scene in picture 36? Are any of the men in Part 1 actually the same as those in Part 2? Or were these Parts produced separately and married together which the discontinuities in style and plot seem to suggest?

Even allowing for the imperfect quality of most of the surviving images, we rarely see clear, close-up pictures of the men's faces in this series, despite their military pedigrees they don't even have tattoos, which are normally a great aid to identification.

However, Royale also published a series labeled 'DTS' which they said featured the same 3 men (see catalogue note below). It consisted of 20 pictures, but most of them seem to have been lost


In the thumbnail you can see they are wearing similar uniforms to the men in NARO with one in boots and gaiters

Royale generally used the initials of the actor's/model's names in set ID's, except when it had a story code, like NARO. There's no obvious clue to such a title in the DTS catalogue blurb (although it might mean Drilling Three Sailors, I suppose). S here could represent Spike and T Tom or Ted but who is D? It serves to seed a more doubts about identities


Royale Studio - DTS02 Garden Trio

The catalogue description refers to a garden setting for some of the DTS pictures. This is presumed by me to be one of them, it's clearly the same three men as the DTS thumbnail, looking very hunky in clinging Royal Navy shirts. The garden setting points to a connection with NARO Part 2 and it's quite easy to identify them individually there.

Tom, (on the left), presents fewest ID problems, we see a lot of his face in Part 2 (pictures 17, 18, 32) and it's clearly the same man. He's also wearing the same distinctive white shoes.

Ted (in the middle) is plausibly, the same Ted we see being pulled out of the car (in 16) and being manhandled in 17 and 18. His face is not really seen clearly after that in Part 2 apart from the NARO thumbnail (numbered as picture 23) but that Ted isn't obviously the same man, despite his similar curly hair and the distinctive gaiters and boots.

Spike (on the right) is a pretty good match for Spike in 17, 31 and 36, complete with white shoes.

Having linked names to faces, if Ted is 'D', Tom is 'T' and Spike is 'S', then the left to right sequence of the men in the thumbnail photo at the top of the post exactly matches the title, DTS. Convinced? No, I'm not sure either!

~

Spike has a slightly different look in the water-throwing pictures in Part 2 (e.g 24, 25), where the slicked-down, dark hair at the back of his head doesn't seem to fit with the light curls we see tumbling from under his cap in the front views (just above). However his eyes in 24 do match those in 31. In this and other pictures of Spike in Part 2, (e.g. 21, 22), he does have curls at the front, but it's layered elsewhere and fairly well 
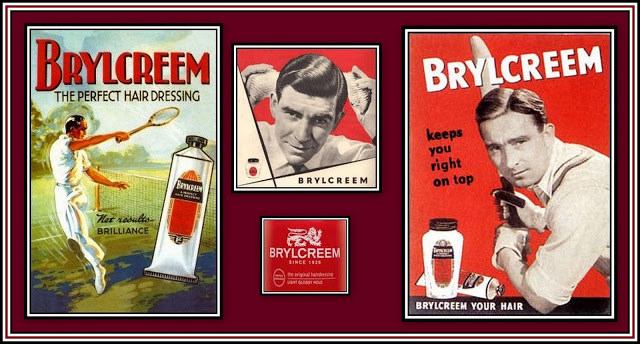
greased (perhaps with a contemporary product called Brycreem) which would explain the darkening. 

1950's Hair Care (featuring cricket star, Dennis Compton)

The water-throwing images also seem to feature a different-looking Ted. I suppose it's conceivable these images were re-shot with different models but I can't find any obvious clues for that, except perhaps the strangely altered roping in 28 where Spike's face also appears particularly different. However there is a detail in 28 that does link Spike from NARO 2 into the DTS group and it is brought out in the better quality version below

Royale Studio - DTS03 Three Bare-Top Sailors

This is a version of the thumbnail picture with the legs cropped out. Ted and Tom look a bit glum, like criminals in a line-up. Perhaps it's those wet trousers to blame, Ted's are particularly unflattering although they do all look nicely laundered in this image.

Spike is the only one who seems to be keen to make the most of breaking into the world of modeling. Notice that he has a characteristic way of resting his left hand on his thigh, hooking his thumb into the front flap of his sailor's trousers. It helps to accentuate his 'bulge' here of course, but Spike in NARO 2 strikes the same pose in 28 and in the 'gloating pictures' 31 and 32


Linking The Cast Members In Parts 1 and 2

Spike's hand-on-thigh pose also appears in NARO Part 1, in picture 14 and the DTS picture above gives us other circumstantial evidence for linking to Spike into both Parts 1 and 2 – it's the tiny tear on his right thigh (which I pointed out in my Part 2 commentary), it's visible in both NARO 1 (10 ) and NARO 2 (21) as well as this DTS picture. Having said that, Spike is not the only man who wears these split trousers, more of that in later articles.

Unfortunately none of the model's faces are seen clearly in Part 1, many of the pictures show only back views and the rest are mostly oblique angles or otherwise obscured. 

The best shots of Spike are 09 and 14 but these are not very helpful in identifying him as the man in the picture above (apart from the curly hair in 09). However the eye and cheek area seen in the rear, three quarter views in 03 and 04 could credibly be the same man we see in the gloating images of Part 2. The tiny glimpse of his face reflected in the mirror in 08 is also unexpectedly persuasive, when seen in the original image.

Incidentally, Spike is wearing dark shoes in the Part 1 pictures e.g. 08, 14 and in the DTS thumbnail above. But he wears white shoes in the Garden trio also above and throughout Part 2. This tiny discontinuity supports the theory that Parts 1 and 2 were created in separate shoots.

Tying Ted into Part 1 is also problematic thanks again to the lack of clear, full face shots. There are two glimpses of him where there is a fair amount of similarity, however - in picture 05 and in the mirror reflection in picture 02. Like Spike his dark hair is confusing here (again possibly the result of using a greasy hair product like Brylcreem!). There is other circumstantial evidence linking his appearances in Parts 1 and 2 - the gaiters, of course, but also Ted's chunky build in picture 04 is a good match for his figure in No 34 in Part 2. His very different appearance in 14, which first triggered my doubts on this identification issue, also pairs reasonably with well with the way he looks in No 31.


Tom's identfication is easy in Part 2 but in Part 1 it is the most difficult of all to verify. The nearest we get to a decent shot of his face is a series of indistinct profiles (e.g. 03) in which he looks much more lean and youthful than the frontal images in DTS and NARO2. However we can see his dark, curly hair and there is something of that lean look in the rear view of him seen in 19 from Part 2 (extreme left). 

But just when the identity issue seems (more or less) resolved up pops this...........


Royales Studio - DTS04 Sailors Sitting On A Bench

This is the only other DTS-like image I have found and you can spot Ted (left) and Spike (centre) right away, However the man on the right is scarcely recognisable as Tom apart from his hair. Spike's dark shoes link this photo to the NARO 1 shoot, where Tom did appear to have a relatively gaunt appearance, but he doesn't look like this at all in the DTS thumbnail at the top which is also linked to NARO 1. 

It's possible this is just a trick of the lighting, I guess. You can see he's strongly lit from one side. There could also have been a different shoot with another man in Tom's place but that doesn't seem likely, Perhaps he's simply a 4th man who happened to temporarily join in the DTS shoot, a technician or visitor perhaps who wanted to try his hand at being a wet sailor! This might even be a previously unknown shot of Basil Clavering or of Scott the photographer, who knows?

~

Royale Studios - Catalogue Thumbnail for set TOH

Like other Studios, Royale produced solo sets of most of their models and we have a thumbnail (but nothing else) from the one that Tom posed for, labeled 'TOH'. The photographer has cannily chosen an upward looking viewpoint to make the most of the carefully-prepared crotch area. This open legged stance, very masculine and suggestive of confrontation and simmering belligerence, is typical of Royale's output


The catalogue blurb tells us that the model's full name is Tom Harding and he appears in several other Royale sets as we shall soon see. Tom's wearing his Navy kit again here but these solo shoots were often pure beefcake sessions in swimming trunks or posing straps and these sometimes turn up on vintage beefcake sites, sometimes under different model names. However, I've not found any examples of Tom in this form yet.


Royale Studios - Catalogue Thumbnail for set SPM

This thumbnail is supposedly for Spike's solo set, full name Spike Millican. Despite the corroborating evidence of the catalogue entry below, it's very hard to see this man as the boyish Spike from the closing scenes of NARO 2 although he does have the same tousled hair at the front and the same distinctive cleft chin. 

His gaunt look here is rather like “Tom's” shocking appearance in the bench trio but I'm pretty sure it's not that man. It's the same side lighting effect though and unusually for Royale, his whole crotch area is hidden in shadow bar a suggestive 'ridge'. From his face and stance it looks almost as though he's just had a bucket of water tossed over him. Or perhaps it's his modeling - or romantic - aspirations which have just been doused.


I've not found a reference for Spike in any other Royale set and there is a simple explanation for this last puzzle, but I will reserve that for the next post!

 I've not found a solo shoot for Ted in the Royale Catalogues despite his attractive muscular build, nor any other mention of him in other Royale sets. I'm still wondering if he has another identity as 'Dave' or 'Dennis'!

The Royale Series continues next time with 'Navy Gash' (link pending)

~

On-going Upgrade of Royale Studio Posts at mitchmen

 
The original mitchmen Royale series (2010) is currently being extensively revised and extended.
This completely new article is the 3rd post in the 'Navy Romeo' Set, together they replace the original Royale post No 2.
To see which articles have been revised to date, please check the 'Come and Get It!' post. I occasionally revisit these articles with further, minor upgrades which are logged there by dates.

The next article in this series is Royale Studio 3 - Navy Gash

Read the new series of Royale Studio articles at mitchmen from the start:-
Royale 1 - Sailors Flogged in the Rigging

You can access all the old and the new and revised articles
simply by clicking on the 'GIU/Royale' label at the foot of this post


'mitchmen' Royale Studio Open Archive
 
As an adjunct to the on-going article upgrade I am gradually creating an archive housing my entire collection of Royale images. I have added this latest image to the existing Royale 01 'Sailor in the Rigging' folder at the mitchmen Royale Studio Open Archive and if you follow the link below you will find there's also a new zip file there which includes them all for easy downloading. 
 

mitchmen archive for:-Royale Studio, Navy Romeo & DTS

  Please tell me via my profile link if you have any difficulty downloading 
 
~

If you have any other Royale images from this or previously published groups and would like to add them to the mitchmen Open Archive please contact me via my profile page link.